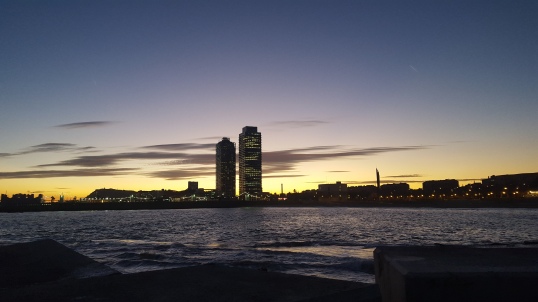
I might have moved under a rock for the past month or so, but I promise that it’s not because I didn’t want to write! Life has been hectic, especially when October rolled around. There were several events taking place at my workplace, Halloween, and my boyfriend’s Birthday on Halloween. Add my Barcelona trip planning on top of that, and I was/am a very busy lady. (More on that Barcelona Trip soon!)
So for Halloween, I decided to finally attempt to make my very own magical wand. As you may or may not know, I am a huge Harry Potter fan. I was planning on using it to go with my HP witch costume for Halloween, but I actually didn’t end up attending that party at all. Even so, I am very proud of the wands I made, and I plan to make more in the future.
In honor of the upcoming movie, Fantastic Beasts and Where to Find Them, here is a simple tutorial on how to make magical wands!
Supplies

- Wooden Dowels or Large Chopsticks – Wooden dowels are easier to find and cheaper, but you will have to use sandpaper to round out the end and taper the ends. Large chopsticks are harder to find unless you order them online. Wands are generally 9 to 14 inches in length although they can be as short as 7 inches and as long as 18 inches.)
- Sandpaper – I used general purpose so it took a while to taper the ends, so I recommend getting a rougher grade.
- Acrylic Paint – I chose a variety of browns.
- Clear Multi-Surface Sealer – The Krylon sealer that I bought actually took the natural paint gloss away and gave my wands a more matted look. If you want a glossy finish, I’d suggest either looking for a glossy sealer or buy a separate gloss to apply after your sealer.
- Glue Gun & Glue Sticks – For giving your wand that rugged wood look.
- *** Optional Marbles/Gems – To press into your wand’s handle. I didn’t do this, but I will share how to add them.
Step #1: Sand it Down
(If you went with chopsticks, skip to Step #2)
First things first, you need to choose the thickness of your wand. A lot of wooden dowels will come in variety packs. For mine, I went with the medium size thickness since I’m a woman. Men with larger hands may want to use the thicker wands. A good way to determine which you prefer is by holding it in your hand. Does it look too thin? Too large? Also, is it comfortable to hold?
Once you’ve got that figured out, get your sandpaper out. I suggest putting down a tarp or something to catch the wood shavings if you do this inside. You’ll be using the sandpaper to thin down one end of the dowel so that it tapers toward one side and rounding out the tip so that it’s not blunt. To taper it down, place the sandpaper on your hand and then wrap your hand (and sandpaper) in a tight clenched fist around the one end while holding the opposite end with your other hand. Now twist your clenched hand to scrape away. Keep in mind that your hand may get tired and you may need to take a break or switch hands. Also, be sure to rotate the dowel in circles to make sure you are sanding evenly all the way around.
Rounding the tip is a little more difficult. You can do one of two things. Lay the sandpaper on your hand, cup your hand, and press and rotate the tip into the cupped sandpaper. This can quickly get tiring so I improved. I sat in a chair sitting with my legs together, placed the sandpaper in the crevice formed by pressing my legs together, and used both hands to quickly rotate the dowel while pushing it down into the sandpaper. Imagine trying to start a fire with wood and you have the right idea; only I was doing this in my lap.
Step #2: Hot Glue Handle/Designs
Glue time! I was most nervous about this part. I really thought it was going to be hard to make the glue look like natural wood. Ladies and gents, it’s not! I suggest looking at pictures of wands online to get an idea of how you would like your wand to look. You can do rugged, detailed, ringed, ect.
Firstly you’ll want to take up your wand in your hand like you’re about to cast a spell. Hold it comfortably and look at where your hand/fingers end. Give yourself another half inch or so beyond that and mark it lightly with a pencil. This will be where you glue handle/design ends. Unless, of course, you want the design all the way up the wand.
* Tip: Have 2 small glue sticks worth of glue ready if you want to do a full handle.
To start off, apply a larger bulbous glob of glue on the end to form the rounded tip for the handle. You’ll want to do this on any design since the dowel’s (or chopstick’s) other end is still flat. While holding the tapered side in one hand, rotate the dowel in circles applying generous lines of glue on the wood. If you want the natural wood look, apply the glue against the lines you already have, but don’t try to cover all the wood with glue. This creates the natural looking curves, bends, and nooks you would expect from actual wood. You’ll continue this until you reach the point your marked with pencil. At this point, I chose to add another circle of glue to sort of show where the handle ends more prominently.
* Tip: Try to avoid pulling your glue gun away from the wood too far or not at all until your design is finished if at all possible as this causes those little wispy strings of glue. Not only are they a pain for you, but they could stick to the rest of the glue and wispy bits aren’t very wood like or smooth!
The end result will look awkward, unfinished, and ugly even. No worries. That’s what the paint is for.
Note: Some prefer to wait until the glue is just about dry to roll it about in their hands to create that rolling crevice wood look, but I was impatient about waiting for the glue to reach this point to try it and so thus scared I was going to touch the glue while it was hot and burn myself. #wuss

On the second wand, I did a ringed design. You start again with the bulb on the the flat end, and then do your first and thickest ring where you marked for your “handle” (design) to end. For evenly spaced rings, do your next ring right in between the two end points. The last two rings were then placed between the other points. Ta-da!

Did I mention that a near essential ingredient to crafting is a deliciously spiked beverage? (For those of you that might have noticed the glass.) — For adults only, of course!
*** If you wish to use gemstones or marbles on your handle, you’ll want to apply the glue and wait at least a minute or so before carefully pressing your goodies into the glue. That way the glue will still be warm and malleable to situate your shiny just the way you want.
Step #3: Paint Away
This is when your wand starts looking like a wand! Choose your preferred color and paint away. I bought 4 varying shades of brown for my wands. I even swirled some light and darker colors to get that inconsistent color actual wood might be for my first wand. The second I painted fawn per my best friend as it is a gift.
I really love the way my first wand turned out with all the natural looking crevices. The second turned out very pretty too!


Step #4: Seal and/or Gloss
Time to seal all this awesomeness up so that it doesn’t get damaged. I highly recommend doing this outside due to the fumes and risk of getting sealer on your furniture, belongings, ect. Either way, you’ll need to put down something to set your wands on. I chose foil since I was doing it on my patio.

Now follow the directions on your sealer! I applied several coats of sealer on mine because I am a tad overprotective. What can I say?
Step #5: Begin Casting!
If you are as impressed and infatuated with your wand as I was with mine, you may walk with it for a while practicing your “Swish and Flick” and annoying your significant other by waving it at them while rattling off every spell you know. I really couldn’t keep my hands off of it for the first few hours! Call me a geek and see if I care!
As you can see from comparing, the finished product is more matte and a bit lighter than the ones pictured above on the foil pre-sealer. I’m toying with the idea of leaving them as is or buying a gloss to put on them. Thoughts?

Again, everyone, I’m disappeared without a trace there for a while. I will continue to try to make time for these posts.
I hope you liked it!
PS: Click on the pictures to enlarge them for a better view!